 blog
Backyard Party Lighting Ideas for Weddings
Table of Contents
- String Lights and Bistro Light Arrangements for Romantic Ambiance
- Outdoor Wedding Lighting Ideas: Fairy Lights and Delicate LED Options
- Wedding String Light Ideas: Draping and Installation Techniques
- Lighting Trees, Branches, and Canopy Structures
- DIY Wedding Lighting Ideas: Budget-Friendly Setup and Design
- Pathway, Step, and Reception Lighting for Safety and Elegance
- Outdoor Party Lights for Ceremony, Dancing, and Dining Areas
- Power Planning and Weatherproofing Your Backyard Lighting
- Frequently Asked Questions
Last Updated: October 19, 2026
String Lights and Bistro Light Arrangements for Romantic Ambiance
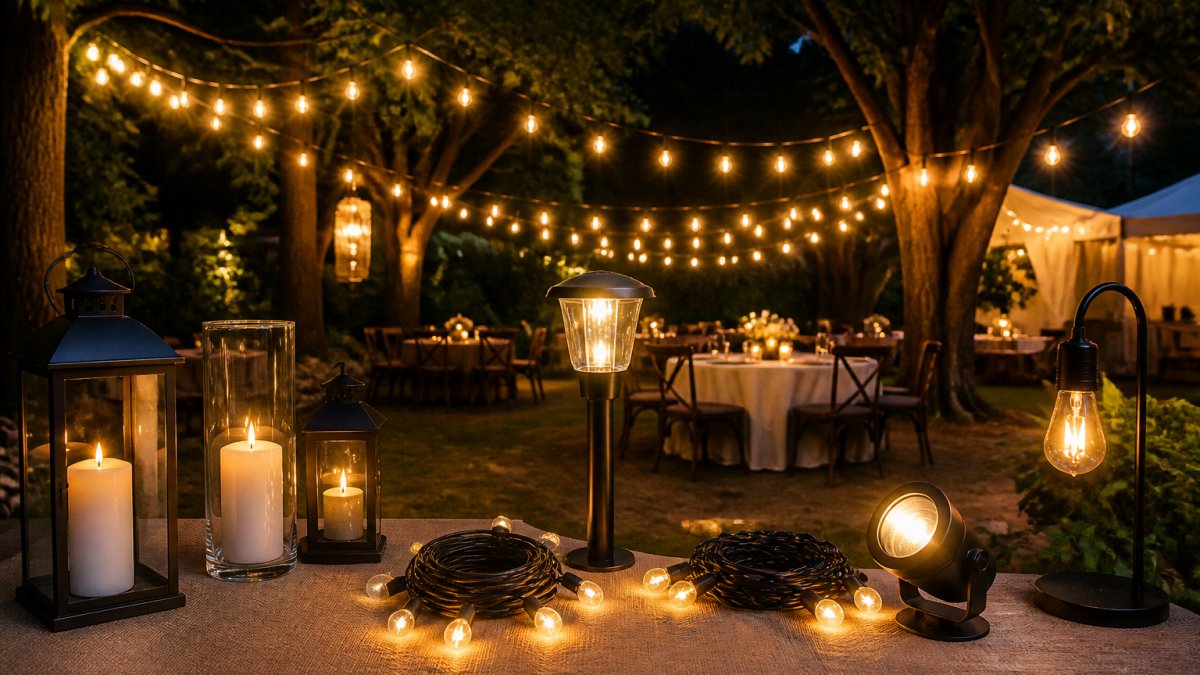
String lights and bistro lights are the foundation of any romantic backyard party lighting setup, instantly transforming an ordinary yard into an enchanted outdoor wedding venue. Layer multiple light sources at different heights and angles to build depth and atmosphere.
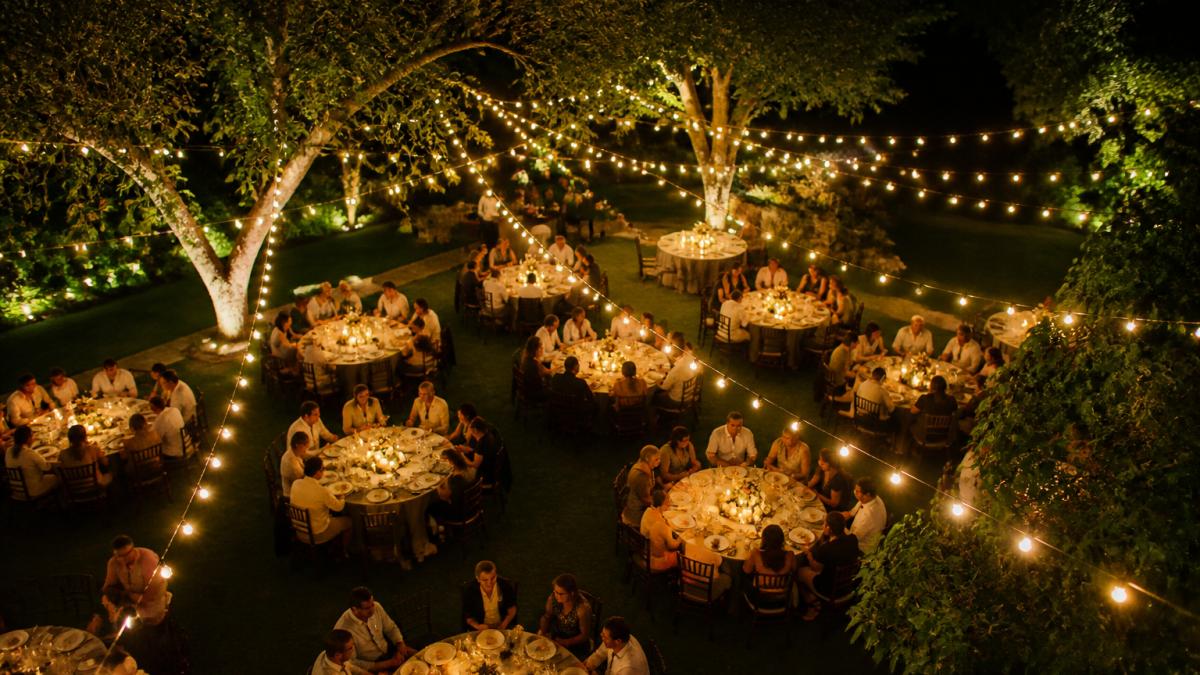
Bistro lights (Edison bulbs or vintage-style string lights) deliver a soft, warm glow that flatters skin tones and creates intimacy. Hung in geometric patterns, triangles, grids, or swooping curves, they frame the space and guide guests' eyes upward.
Here's how to arrange them for maximum impact:
- Hang bistro lights in a grid pattern across your dining area at 8-10 feet high
- Drape string lights in gentle curves between posts or trees for a softer, romantic feel
- Layer warm white and amber tones together, never mix cool white with warm lighting
- Space bulbs 12-18 inches apart for a cohesive glow without harsh shadows
- Install lights before sunset so guests enjoy the transition from daylight to illuminated ambiance
The most common mistake is hanging lights too high or too sparse, aim for density that creates a canopy effect, not scattered points of light.
Outdoor Wedding Lighting Ideas: Fairy Lights and Delicate LED Options
Fairy lights and delicate LED options add whimsy and sparkle without overwhelming the space. These smaller lights work beautifully as accent layers on top of your main string light structure, wrapped around tree trunks, draped through greenery, or clustered in centerpieces to create focal points.
LED fairy lights run cooler, use less power, last longer, and come in battery-powered versions that eliminate extension cord clutter. For outdoor wedding lighting ideas, they reduce the electrical load and simplify installation.
Consider these placement strategies:
- Wrap fairy lights around tree trunks in spiraling patterns, starting 3-4 feet from the ground
- Cluster battery-powered LED lights in glass jars or lanterns as table centerpieces
- Drape delicate lights through flowering branches or climbing vines for organic texture
- Use lights with a flicker effect to mimic candlelight without fire hazard
- Mix fairy lights with floating candles for layered, romantic depth
Fairy lights work best as secondary accents rather than primary illumination, too delicate to light an entire reception area, but perfect for highlighting specific zones like the gift table, photo backdrop, or lounge seating.
Wedding String Light Ideas: Draping and Installation Techniques
Draping transforms string lights from functional to architectural, dramatically changing the mood and perceived size of your space.
The most effective draping techniques use anchor points, trees, posts, tent corners, or installed poles, to create visual lines.
Here's how to execute each style:
Swooping curves: Attach lights to anchor points at varying heights, creating gentle waves across the space. Start high at one end, dip low in the middle, rise again at the far end. This draws eyes through the entire yard.
Geometric grid: Run parallel lines of lights across the space, then perpendicular lines, creating a waffled canopy effect. This works best over dining or dancing areas where you want strong visual definition.
Tent draping: Attach lights to a central overhead point and drape down to surrounding anchor points, creating a tent or umbrella effect. This concentrates light and creates an intimate gathering space.
For wedding string light ideas, plan anchor points before purchasing lights. Measure distances and calculate the length you'll need, accounting for sag in the middle, which typically adds 15-20% to your total length.
Lighting Trees, Branches, and Canopy Structures
Trees are natural focal points for outdoor wedding lighting. Uplighting, downlighting, and wrapping each create different effects, the goal is to highlight the tree's structure while contributing to overall ambiance.
Uplighting positions lights low, pointing upward at the canopy to create drama and silhouette branches against the night sky. Downlighting points lights down from branches, creating pools of illumination below. Wrapping spirals lights around the trunk and major branches for a glowing column effect.
Canopy structures, natural or installed, benefit from layered lighting. Combine uplighting on supporting structures with string lights draped through the canopy itself to create depth and prevent a dark void overhead.
Installation steps for tree lighting:
- Assess your tree's structure and identify major branches
- Position uplighting fixtures 6-8 feet from the tree base, angled upward
- Wrap string lights or fairy lights around the trunk, starting at ground level
- Add accent lights in the canopy pointing downward toward seating areas
- Test the effect during dusk to see how it looks as natural light fades
For canopy and overhead lighting, consider sight lines from guest seating. Avoid positioning lights directly above seating areas where they create glare or harsh shadows on faces, frame views rather than illuminating them directly.
DIY Wedding Lighting Ideas: Budget-Friendly Setup and Design
DIY wedding lighting ideas focus on smart choices that maximize visual impact while minimizing cost. The most budget-conscious approach combines a few high-impact elements with strategic placement rather than lighting every square foot.
Start with one strong focal point, perhaps a string light canopy over the dining area, then add accent lighting around the perimeter. This creates visual hierarchy, and since guests gravitate toward well-lit areas, concentrate your budget there.
Budget-friendly strategies include:
- Use battery-powered LED lights instead of installing permanent electrical infrastructure
- Borrow or rent existing structures (trees, fences, pergolas) as anchor points rather than installing new ones
- Choose warm white lights exclusively, mixing color temperatures adds cost and complexity
- Limit your lighting to active event hours rather than lighting the entire yard all night
- Install lights yourself if you're comfortable on ladders; professional installation adds significant cost
Many couples find renting a quality tent with integrated lighting support structures delivers professional results.
The DIY approach works best with clear anchor points, a manageable yard size, and realistic expectations about installation difficulty. Complex electrical work or high installations should be handled by professionals, the safety risk isn't worth the savings.
Pathway, Step, and Reception Lighting for Safety and Elegance
Pathway and step lighting serves dual purposes: safety and ambiance. Well-lit paths prevent tripping while creating elegant transitions, and reception lighting illuminates dining and dancing areas while maintaining the romantic atmosphere.
Pathway lighting should be subtle but sufficient. Solar stake lights, low-voltage LED path lights, or luminarias create gentle illumination without harsh shadows. Space lights 4-6 feet apart, with extra attention to steps, slope changes, and uneven ground.
Reception lighting focuses on dining and dancing areas. Layer overhead string lights for ambiance, uplighting on surrounding trees for depth, and accent lighting on focal points like the cake table, bar, and photo backdrop.
Consider these elements:
- Install path lights at ground level along main walkways and near steps
- Use warm white uplighting on surrounding vegetation to frame the reception area
- Position accent lights on the cake table, gift table, and photo backdrop
- Ensure adequate light for the dance floor without creating a nightclub effect
- Add string lights or bistro lights over the dining area for warmth and intimacy
Reception and dining area lighting should be bright enough to see food and faces, but warm enough to feel romantic rather than institutional. Avoid cool white or overly bright lighting, which looks unflattering and clinical.
Outdoor Party Lights for Ceremony, Dancing, and Dining Areas
Different areas of your backyard wedding need different lighting.
Ceremony lighting focuses on the altar or focal point. Position uplighting behind the couple so their faces are visible from the guest perspective, avoiding backlighting that creates silhouettes.
Dance floor lighting should be brighter than dining areas but still warm and inviting. Color-changing LED uplighting around the perimeter adds energy without overwhelming the space. Avoid strobe effects or rapid color changes, they're distracting and can cause discomfort.
Dining area lighting emphasizes comfort and conversation. Warm overhead string or bistro lights, combined with subtle uplighting on surrounding trees, create an intimate setting. Avoid direct overhead lighting that casts harsh shadows on faces; candlelit centerpieces complement overhead lights beautifully.
Here's how to coordinate lighting across zones:
| Area | Primary Light | Accent Light | Intensity | Effect |
|---|---|---|---|---|
| Ceremony | Uplighting on focal point | Overhead canopy | Bright and even | Professional, clear |
| Dance floor | Overhead strings | Perimeter uplighting | Bright, warm | Energetic but romantic |
| Dining | Overhead bistro lights | Tree uplighting | Warm, intimate | Conversational, flattering |
| Pathways | Ground-level stake lights | Accent uplighting | Subtle, safe | Elegant, functional |
Power Planning and Weatherproofing Your Backyard Lighting
Successful outdoor party lighting requires practical planning around power, weather, and contingencies. Underestimating electrical needs or ignoring weather risks can derail even well-designed lighting schemes.
Start by calculating total wattage for all your lights. String lights typically draw 3-5 watts per bulb. A 50-bulb string uses 150-250 watts.
Extension cords must be rated for outdoor use and appropriate gauge for the distance and load. A 100-foot extension cord running high-wattage lights needs to be 12-gauge or heavier.
Weatherproofing considerations:
- Use weatherproof outdoor-rated lights and connectors, indoor lights fail quickly outside
- Install a ground fault circuit interrupter (GFCI) outlet to protect against electrical hazards
- Keep all connections elevated off wet ground; use waterproof junction boxes
- Run cords along the perimeter or overhead rather than across walkways
- Have backup battery-powered lights in case of power failure
- Check weather forecasts for wind, rain, or temperature extremes that affect lighting
For rain protection, ensure all bulbs and sockets are rated for wet conditions. Water in electrical connections causes shorts and failures. Tent structures provide overhead protection for lights and guests.
Wind poses a different challenge. Secure all light strings, uplighting fixtures, and anchor points firmly. Test installations in daylight before the event.
Planning backyard party lighting for your wedding involves balancing romance, safety, and practicality.
Backyard Events Rental helps couples bring these lighting visions to life with rental equipment, installation support, and design guidance.
Frequently Asked Questions
How much backyard party lighting do I need for a wedding reception?
The amount depends on your backyard size, desired brightness, and lighting style. A typical outdoor wedding reception benefits from layered lighting: string lights overhead (100-150 feet for average yards), pathway lights every 4-6 feet, and accent lighting on trees or focal points. Start by mapping your backyard layout and identifying key areas, ceremony space, dining area, dance floor, and pathways. Backyard Events Rental can help you determine the right quantity and placement for your specific space during a consultation.
What are the best outdoor wedding lighting ideas for a small backyard?
Small backyards work beautifully with strategic lighting. Focus on vertical elements: hang fairy lights or string lights overhead to draw the eye upward, frame trees with warm LED lights, and use canopy or overhead structures to create definition without taking up ground space. Pathway lighting guides guests safely through the space while adding elegance. Avoid clustering too many light sources in one area; instead, layer them at different heights, overhead, mid-level on trees, and ground-level on paths, to create depth and make the space feel larger.
Can I install DIY wedding lighting ideas myself, or do I need professionals?
Many DIY lighting setups are manageable if you plan carefully. String lights, fairy lights, and pathway lights can be installed with basic tools and proper planning. However, complex arrangements, especially overhead canopy lighting, electrical integration, or weatherproofing, benefit from professional installation to ensure safety and reliability. Consider your comfort level with heights, electrical work, and securing heavy fixtures. Backyard Events Rental offers rental packages with professional setup included, eliminating installation stress so you can focus on your wedding day.
How do I create a romantic glow for an outdoor wedding without overspending?
Layer warm-toned lights strategically to maximize impact. String lights and bistro lights provide cost-effective overhead coverage; fairy lights on trees add enchanted ambiance; and candlelight (real or battery-operated) scattered on tables creates intimacy. Focus spending on high-visibility areas, the ceremony backdrop, reception dining area, and dance floor, rather than lighting every corner. Renting equipment is often more affordable than purchasing, and combining rental lighting with natural elements like greenery and drapes stretches your budget further.